Cybersecurity Home Lab - Configuring Security Onion IDS
- Jv Cyberguard

- Feb 22, 2023
- 4 min read
Updated: Jul 18, 2023

Part 2- Configure Security Onions IDS
Part 2- Configure Security Onions IDS
As mentioned prior, Security Onion will be our IDS that will ingest frames from the Victim Domain network that come through on the em2 interface.
Firstly download it from the github link below:
Create new virtual machine and select the iso. Select the guess operating system.

The minimum hardware requirements listed on the site are below.

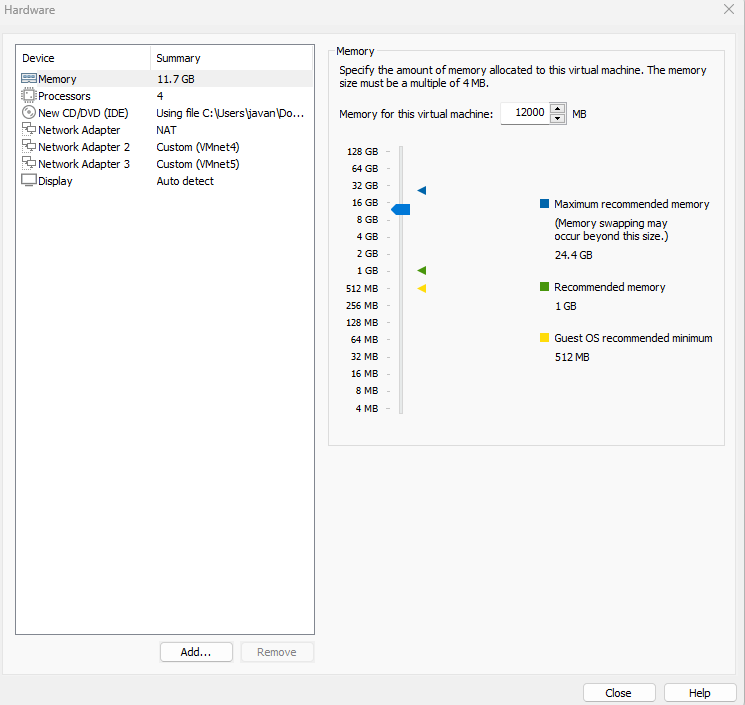
In the wizard we click customize hardware and set memory to the minimum, set the processor cores to 4 and add 2 additional network adapters and connect them to vmnet 4 and 5 respectively. I ended up provisioning more RAM carrying it up to 16GB of RAM.

Power on the machine and install security onion with basic graphic interface.

Type yes when this pops up.

Follow the other prompts and enter username and password. It will reboot when finished.
After reboot this screen will show.

Click Yes > Install > Select Eval version > Agree for the Elastic License > Give it a non default hostname > Give it a description > Then we will be using the second interface(ens33) as a management interface so we click space bar to select it.
As a side note, when initially following the tutorial for SecOnion setup, we had done it through DHCP and there was a Network Adapter that was directly connected to VM virtual network in addition to em3 and em4 being connected to the firewall. I felt that this kind of defeated the purpose of having Security Onion sitting behind the firewall so I dumped the configuration and started over with what I am currently showing you guys. Also, when the lease for the IP address ends you will have problems changing the web access URL. So that is why we will be using ens33 as the management interface and configuring it with a static IP 192.168.3.10


For gateway enter the ip address for the interface at the firewall connection. Which in this case would be 192.168.3.1
For search domain enter the domain name of your victim network.
Next we select Standard

We also want direct connectivity to the internet.

We will next setup the monitoring interface which will be ens 34 on vmnet5.
The next page we can leave as default since it already contains all the private ips. On the page after that if there is something you won't be using we can unselect it. However, I leave everything selected.

We also want to keep the default docker IP range as seen below.

The next slide prompts us to create an email address to access the web interface. It does not have to be legitimate. Just ensure you do not forget it.
The page after that then asks us how we would like to access the web UI. You can leave this as IP

On the next page we will be asked to allow NTP service ensure to select Yes and then leave the default on the following page.
We will next be prompted with the follow but we don't want to run so-allow right now because we need to do something else before running it so-allow.

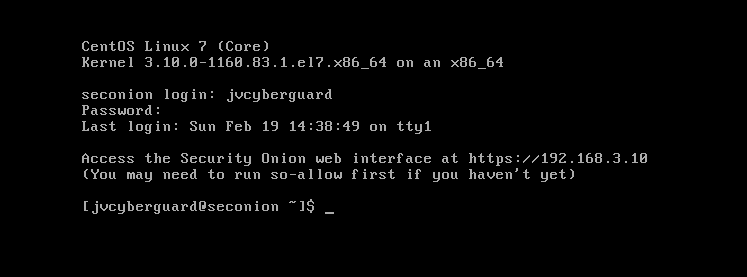
On the summary page, take note of the access url. This is what you will enter to access Security Onion through the web interface.
Creating Ubuntu Desktop machine to access Security Onion
To completely create an actual SOC experience, we will have access to Security Onion occur from an external machine. So we next download and configure Ubuntu desktop.
It can be downloaded from here:
VMware will likely trigger easy install. Where you will have to enter Easy install information including:

Proceed through wizard with default options. It should look like this on final page. Please note that sometimes the information entered in the easy install section does not carry over to the actual machine.

When Ubuntu boots, then also proceed with the defaults through the installation wizard.


Once install completes it will prompt you to restart. Feel free to refer to this guide if you experience issues during the install. https://itsfoss.com/install-ubuntu-in-vmware/
Once, installed we next have to get the net tools package so we can use ifconfig command etc. To do this we run the command sudo apt install net-tools

When we try again the ifconfig command now works. Please take note of your machine's ip.
Your should get an IP from the VMware DHCP server since you will be on the VMware NAT network called NAT.
Now we want this machine to have a static IP because in Security Onion we will only list one IP for having access to the web configurator for now, so in the top right corner click wired connected.

Then click the cog and the 'Wired' window will pop up.

Click IPv4, select manual. And give the machine an IP in the same subnet as the IP it was assigned. The netmask will likely be 255.255.255.0 and the gateway will be the IP address assigned to the WAN (em0) interface of the firewall so that it can talk to the Sec Onion box.
Currently, if we try to access Security Onion through it's IP we won't be able to connect. That is because we haven't configured so allow as yet. So we will return to the security onion machine to do so now.

Enter the command sudo so-allow
So-allow allows us to add a firewall rule for an IP address to grant us access to Security onion.
The rule we will choose is analyst and the static Ip will be that of the ubuntu machine.

We will try accessing it again from the Ubuntu machine. The IP we will enter is the one we noted as the access url for Security onion and voila! For Mozilla and Chrome you will get a warning but simply click advanced then accept the risk or click proceed

Then login in with the email you gave as well as the password for security onion. Then you will be greeted with the below screen.

And that's it. Our SOC!
Take initiative here! Some things you can do is setup VPN so that machines that access our soc has to be on the subnet on the network.


Comments